Tuesday, April 22, 2025

Capture the Prize!

Do I know you from somewhere?

Nick and I got together for a game this past week. Looking for something fun but simple, we opted for the previously played 'capture the prize' scenario, albeit at 5500BV, Lostech Era. He would be fielding the objective mech this time, and oh so scary Highlander HGN-732 (I think) with it's fully functional gauss rifle. Yikes!

I was fielding the Marik Militia with a Quickdraw QKD-4G, A Chameleon TRC-4B, a Marauder MAD-3M, an Ostroc OSR-2C and (due to the odd BV limit), a Cicada CDA-2A with a 4/4 pilot. 

Baxter's warming up the table. 

Making their battlefield debut were Nick's mercenaries, the 'Swamp Foxes'. He was fielding the Highlander HGN-732, a Quickdraw QKD-4G, a Maraduder MAD-3R and a Valkyrie VLK-QA. 

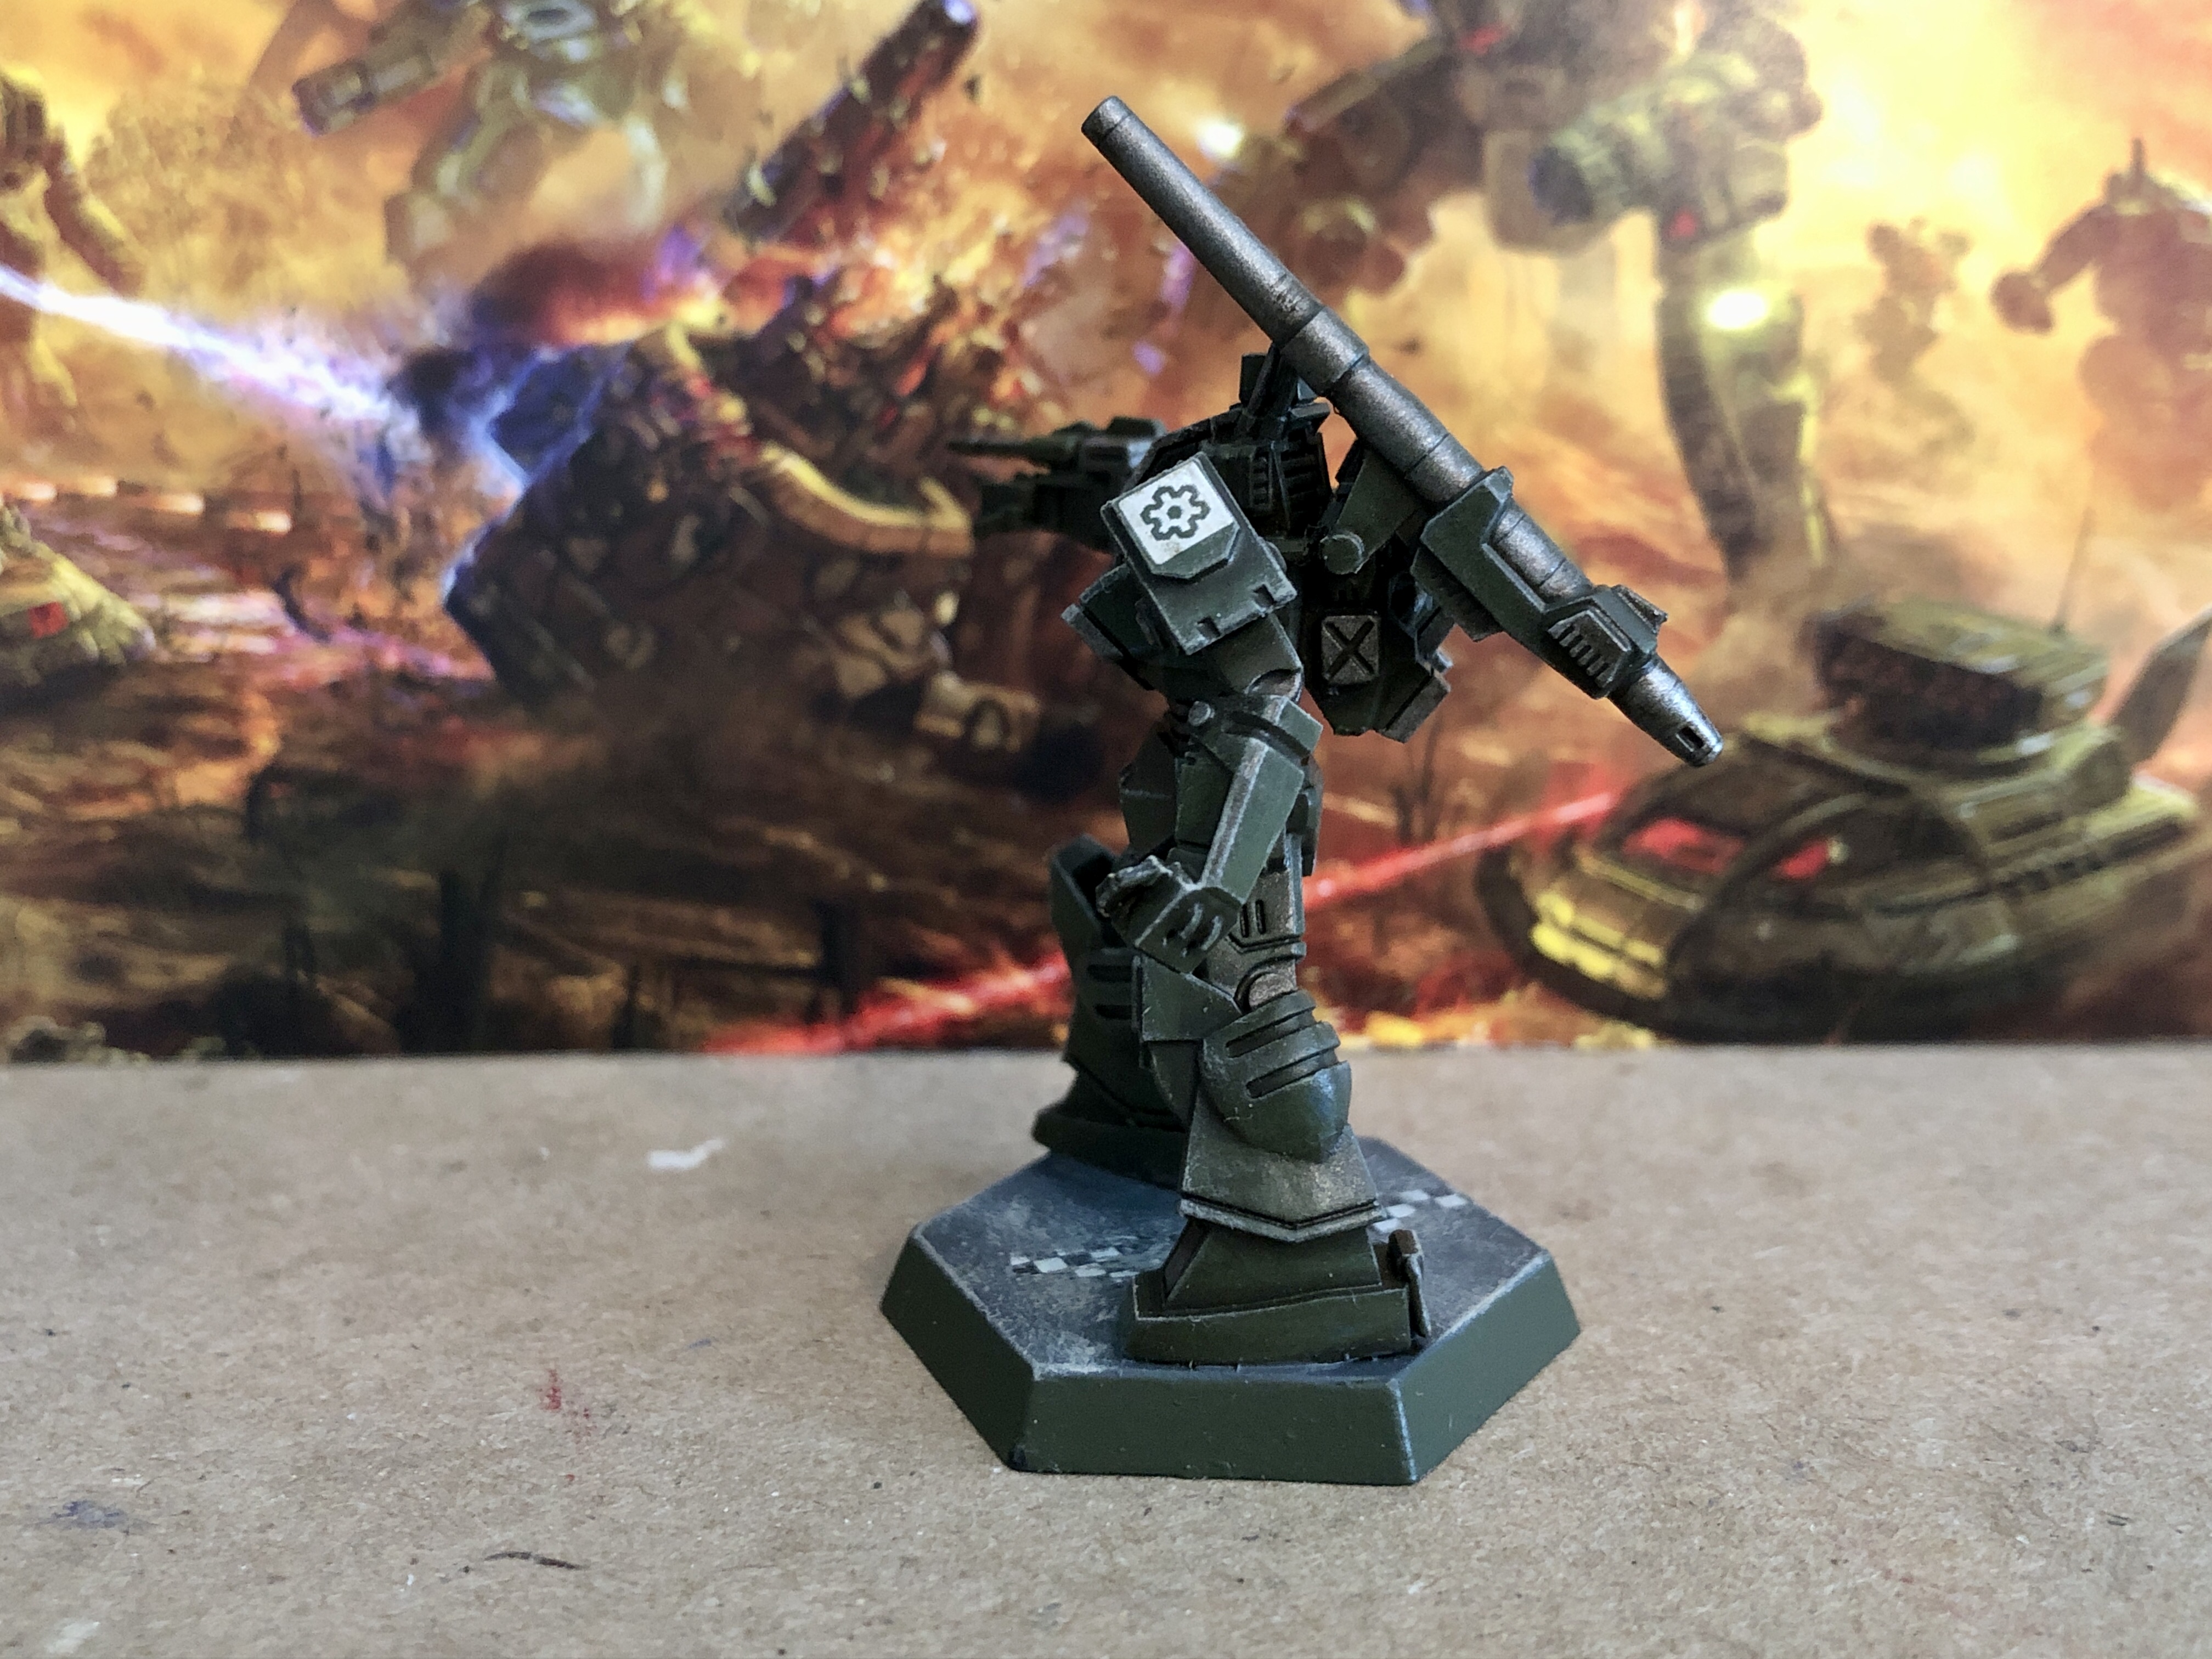
So Impressed was I with Nick's paint jobs, the freehand in particular that I thought I'd show a few of them off before getting to the battle report. 

The Marauder 'Skull Crusher' (that name is painted on the other side).

"Bad Luck'

Most impressive!

Swampy bases to go with the unit's name.

The Battlefield on my new battlemat from Mats by Mars (same place I got my older city mat). 

Opening maneuvers and a few ranging shots. 

The Ostroc hit with all of its shots, but was not prepared for the gauss slug that knocked it off of it's feet!

One of several passes Neeka made across the board during the game. 

This one got up close and ugly real quick! The Ostroc & Chameleon unloaded and overheated something terrible, but most of their shots counted. 

Speaking of, at point blank range the Chameleon is a literal death by a thousand paper cuts. Fun fact: (in hindsight) Skip the large laser at this range or it will take 2-3 turns to shed the excess heat. 

Mirror match! 

Meanwhile the Cicada was taking a highspeed tour of the backfield...

Guess who lost said mirror match?

The Valyrie likewise falls from a multitude of hits. 

As my Marauder moves into range and the Chameleon jumps into cover, Nick's Quickdraw jumps into the Marauder's rear arc much to my surprise! The Chameleon came to it's aid wrecking my intent to sink the excess heat. Luckily the Quickdraw wiffed!

The Valk regains it's feet only to find the Cicada on approach.

All shots hit followed by a savage kick that took off the Valyrie's leg!

Hard to recall what all happened here other to say it was an ugly scrum. I want to say that Nick's Marauder lost a side torso, forcing it to try and withdraw. 

This moment of potential terror was averted when the Gauss slug went into my Marauder's arm, rather than it's back! It tooks some LRMs to the back, but nothing went thru. 

The scrum meanders back towards Nick's side of the board. 

Unable to shoot the Highlander, the Ostroc keeps pounding away at the Marauder.

Which goes down in an epic double kill! Nick's fell to an ammo hit whereas mine to a headshot that critted the cockpit, killing the pilot!

Unfortunately, this did not bode well for the Highlander's escort which was down to the now battered and bruised Quickdraw...

..and as such Nick ran up the white flag and powered the Highlander down. Victory to Marik, Huzzah!

Well that was fun. It was kinda funny in how both of our lists sort of mirrored one another with a Quickdraw and Marauder each. Am hoping it won't be too long before our next game, but he is out of town often due to work, so we will see. 

Friday, April 18, 2025

Steiner Scout Squad!


Quoting Frankie here: 'Oh, I thought you were painting space marines.' 

Yes, I finally painted up the classic Battletech meme lance: the Steiner Scout Squad. That said, Frankensteins's Monsters is a more apt name for this lance. Let me tell you how much fun these weren't to paint. First, I tried painting them up as the Lyran Royal Guards and...hated it. Let's just say that that color scheme is a royal bitch to paint (yes, pun intended). 

 Altas # 8. I like the numbered triangle on the base, I may have to do more urban bases like that. 

Into the Simple Green they went and after stripping, I primed them dark grey. I then dry brushed them in sucessively lighter shades of grey with the intent to make them look like my Clan Coyote mechs (which I now realize that I have yet to post on here). 

 Atlas # 10. For those wondering, the large triangle decals come from the old GW Space Wolves decal sheet.

Anyways, they were looking pretty good except, Steiner doesn't really have any grey units. So I committed a cardinal sin and then drybrushed on a darker blue (dry brushing darker colors over lighter ones, hide the lighter colors are underneath in a not good way). Still, they didn't look terrible. 

Atlas # 7. Admit it, the song Radioactive by the Imagine Dragons is now stuck in your head, right? You're welcome.

Then I inked them with my usual method of the AK streaking grime as shown on the Shadow Hawk here. Annnnnd when done, they more or less just looked black. I was not happy. So, I drybrushed them again in a lighter shade of blue this time and...they look alright I suppose. 

Atlas # 9. Unless I took a pic from the back, there was no good way to photograph this one's base. Guess I ought to have done that in hindsight (no pun intended). 

They're numbered from numbers 7 thru 10 meaning they would normally be split between two separate lances in a company formation. However, I'm not too keen on painting up anything more in this color scheme. As such, for now these four are likely to be my only contribution to the 5th Donegal Guards. 

Monday, April 14, 2025

Coolant Truck Scenario

Coolant, gimme fresh coolant!

Mal & I got together last week for another game. This time trying out my coolant truck scenario which I based off of an Alphastrike scenario that I found...on reddit maybe? Below is said scenario (its a bit of a long one): 

Each player has 5,000 BV forces. 

Following a recent battle, the defending forces are falling back to a Forward Operating Base (FOB) for repairs and maintenance. As the defenders are approaching the FOB’s defensive perimeter, an enemy vanguard is detected on approach. Unfortunately, the defender’s battlemechs are in no shape for a direct engagement until they’ve undergone basic maintenance. 

The defender chooses a table edge and marks a zone (that is the size of my firing arcs template) representing the forward operating base. The FOB is placed anywhere along their table edge. It must be six hexes from the table edge, and at least six hexes from either side of the table. Place a coolant truck at the center of the FOB. The attacker’s table edge is opposite the defender’s table edge. 

Next, the defender places four watchtowers on the table. Place the first tower within 8 hexes of the base’s perimeter. Further towers can be placed anywhere on the table, but must be within 8 hexes of another outpost and not within the base’s perimeter. Towers may not be placed within 10 hexes of the attacker’s table edge. Each Tower is a heavy building with 40 CF. Outposts may be a spotter for indirect fire. 

The defender rolls for each of their mechs for pre-existing damage, either: 4 SRM hits or 3 small laser hits (ideally half of the force should take SRM damage, and the other half SL damage). Roll for locations using the front facing chart, rerolling head shots, critical hits are ignored. The defenders’ units are placed within their walk/ground speed of the table center in initiative order. 

OBJECTIVES 

Emergency Cool down: The defender’s mechs are damaged and need a coolant swap before they can be fully effective on the battlefield. A defender’s battlemech’s heat sinks function at half efficiency until they undergo a coolant swap. Each of the defender’s battlemechs must perform the Coolant Swap action to be restored to full efficiency.  Score 1 VP each time a battlemech completes the Coolant Swap sequence.  

Hold the Line: The defender scores 1 VP for each enemy mech that is destroyed or forced to withdrawal. 

Slash and Burn: The attacker must destroy as many watchtowers as possible to help clear the way for a future assault. The attacker also scores 1 VP for each enemy mech that is destroyed or forced to withdrawal. 


SPECIAL RULES 

Coolant Swap: A defending battlemech’s heat sinks function at half efficiency until the coolant swap action is taken. To perform this action, a battlemech must end the Movement Phase adjacent to a coolant truck and announce the mech is hooking up to the coolant truck. Hooking up requires the remainder of the turn and the mech may make no attacks, nor be attacked (per standard Succession Wars battlefield etiquette). The coolant swap takes 1 round (so 1 round to get into proper position of the coolant truck, and 1 turn to perform the coolant swap). Only 1 mech may perform a coolant swap at a time. 

 If during the coolant swap the battlemech expends any movement points or moves at least a hex due to forced movement, the mech takes a 5 point of damage grouping allocated by the Kick Hit Location and the coolant truck is destroyed. The coolant truck is too valuable to be directly targeted by the attacking forces. 

Forced Withdrawal: The attacker & defender must adhere to the Forced Withdrawal rules. A mech is considered crippled and forced to withdrawal when it suffers any combination of the following: 

  • 2 engine hits 

  • 1 gyro hit 

  • When it loses a side torso 

  • When all ranged weapons are rendered inoperable 

  • When at least 3 locations have suffered internal structure damage 


Here are some pics from the game, but with Mercuries running rampant in all directions, it was kinda hard to keep track of what was going on where.

I was fielding the Capellan Confederation (early succession wars era) with an Assassin ASN-21, A Mongoose MON-67, six Mercury MCY-98s, and a superfluous mountin infantry platoon to guard the FOB. 

The battlefield with the FOB plainly evident. I forgot that I don't have 4 watchtowers, so 4 apartment blocks were used in their place. 

The Mongoose undergoing an early coolant swap with a Mercury waiting in the wings for a swap next. 

Mal's always ready for a fight!

This week the Infernal Legion was fielding a 3/5 STK-3F, an Archer ARC-2R, A wolverine WVR-6R and a Commando COM-2D. 

Turn one and Mal's lance took down Watchtower # 6 for an easy VP. I tried to claim war crimes and the killing of civilians. To which Mal replied: Civilians don't spot for indirect LRM fire.
(Oh come on, it was only an LRM-5...).

By this point Mercury # 5 was into internal structure on it's leg and well too far forward for any hope of a coolant swap. Screaming For the Confederation! It unloaded into the rear armor of the Stalker and managed to hit with everything, including a few rear torso shots! Of course it's paltry weapons didn't punch through the Stalker's armor

Mercuries! Mercuries everywhere...

Having never fielded any of these mechs previously, Mal was having a hard time getting a feel for them as the Mercuries ran in all directions, sniping from every angle (all that was missing was the Benny Hill theme music). 

I screwed up and left the Assassin out of position, wasting a turn before got into proper place next to the truck. Here it is getting a coolant swap for a 3rd VP, while another Mercury is heading in. 

Oh btw, the Stalker reversed it's arms and destroyed Mercury 5, for Mal's 2nd VP. 

Chaos was reigning across the board when unfortunately we ran out of time, as the FLGS was closing. 

In the end, I won by a slim margin of 3VPs to Mal's 2. Had we not run out of time, who knows who would have won. Mal did pose a question to me after the fact of: how many victory points were needed to secure victory? Uhh...yeah, I dunno. I hadn't thought of that, 8 maybe?

I thought I was in trouble as I figured that she would simply take down the 4 towers for 4 easy VPs. However the horde of distraction bots did just that, and she forgot about targeting the towers after the first turn.

Honestly I am not sure how this would have worked out if she was defending as I likely would have surrounded the FOB and she'd more or less be forced to circle the wagons.

Here are Mal's thoughts on this one:

The "damaged lance needs to refuel" concept is cool, but I'm not sure how to balance it. Maybe they get some light turrets instead of watchtowers that can only do spotting? Or have a time limit for the attackers; if all enemy units (or a minimum of 4, if one has a swarm) get refueled, the attacker has to withdraw, with the premise being hitting the weakened lance is a target of opportunity, but if they get resupplied, it would just become a pitched battle the attackers don't need to force.

I guess I'll have to tweak this one some more and maybe try it without any small fast hordes to see how it would work out (though it was built for the Mercuries, something I forgot to mention to her before game.

We had fun though.

Friday, April 11, 2025

New Shadow Hawks


Let's just get this out of the way up front: Shadow Hawks suck. There, I said it and with that out of the way let's move on. 

I bought these from Reddogminis.com (who is having a sale it seems, so more minis are on the way). These two (three actually, I have one set aside for Nick 2.0) showed up within a week and flawlessly cast. Plus there are two arm options allowing for slightly different posing. Not much more to say than that so I'll just show off some my pics of these two. 


Alternate  arm options

I left the LRM-5 off of this one and covered up the SRM launcher to use as a Primitive Shadow Hawk. 

The Desert force Shadow Hawk, painted, sealed and ready to get dirty...

...and dirty it is! Slathered in the AK streaking grime. 

After a 10ish minute pause, the excess grime is removed via mineral spirits and severl Q-tips and here ya go! Easy peasy (and why the desert force has exploded in size so quickly). 

The primitive got the same treatment, but it is not as noticble on OD green as it is on the wraithbone primer. This one is painted for my 65th Lyran Regulars.

Callsign: Daisy, with the decals to match

Yes Votann players, it is a daisy. Get over it.

Finished Desert Force Shadow Hawk.

The 9th mech in the unit, there will be a full mech company in no time!

And they said Nuln oil was liquid talent...bah!

Two more, ready to go!